

Who can use this feature? | |
| Available on | All Plans |
| Available to | Owners and Managers |
Voxiplan allows you to set up your weekly availability and create custom schedules to control when you are available for appointments. This guide will walk you through managing your general availability settings, adding multiple time slots, and overriding your schedule for specific dates.
1. Access Availability Settings
To manage your availability, follow these steps:
In your workspace, click on the Availability tab at the top of the screen.
This opens the page where you can view and configure your weekly availability and add date-specific overrides.
2. Set Your Weekly Availability
Your weekly availability is where you define the regular hours when you are available for appointments. Here’s how to configure it:
Days of the Week: You can toggle the checkboxes next to each day to mark whether you’re available or unavailable. By default, Monday to Friday are selected, while Saturday and Sunday are marked as unavailable.
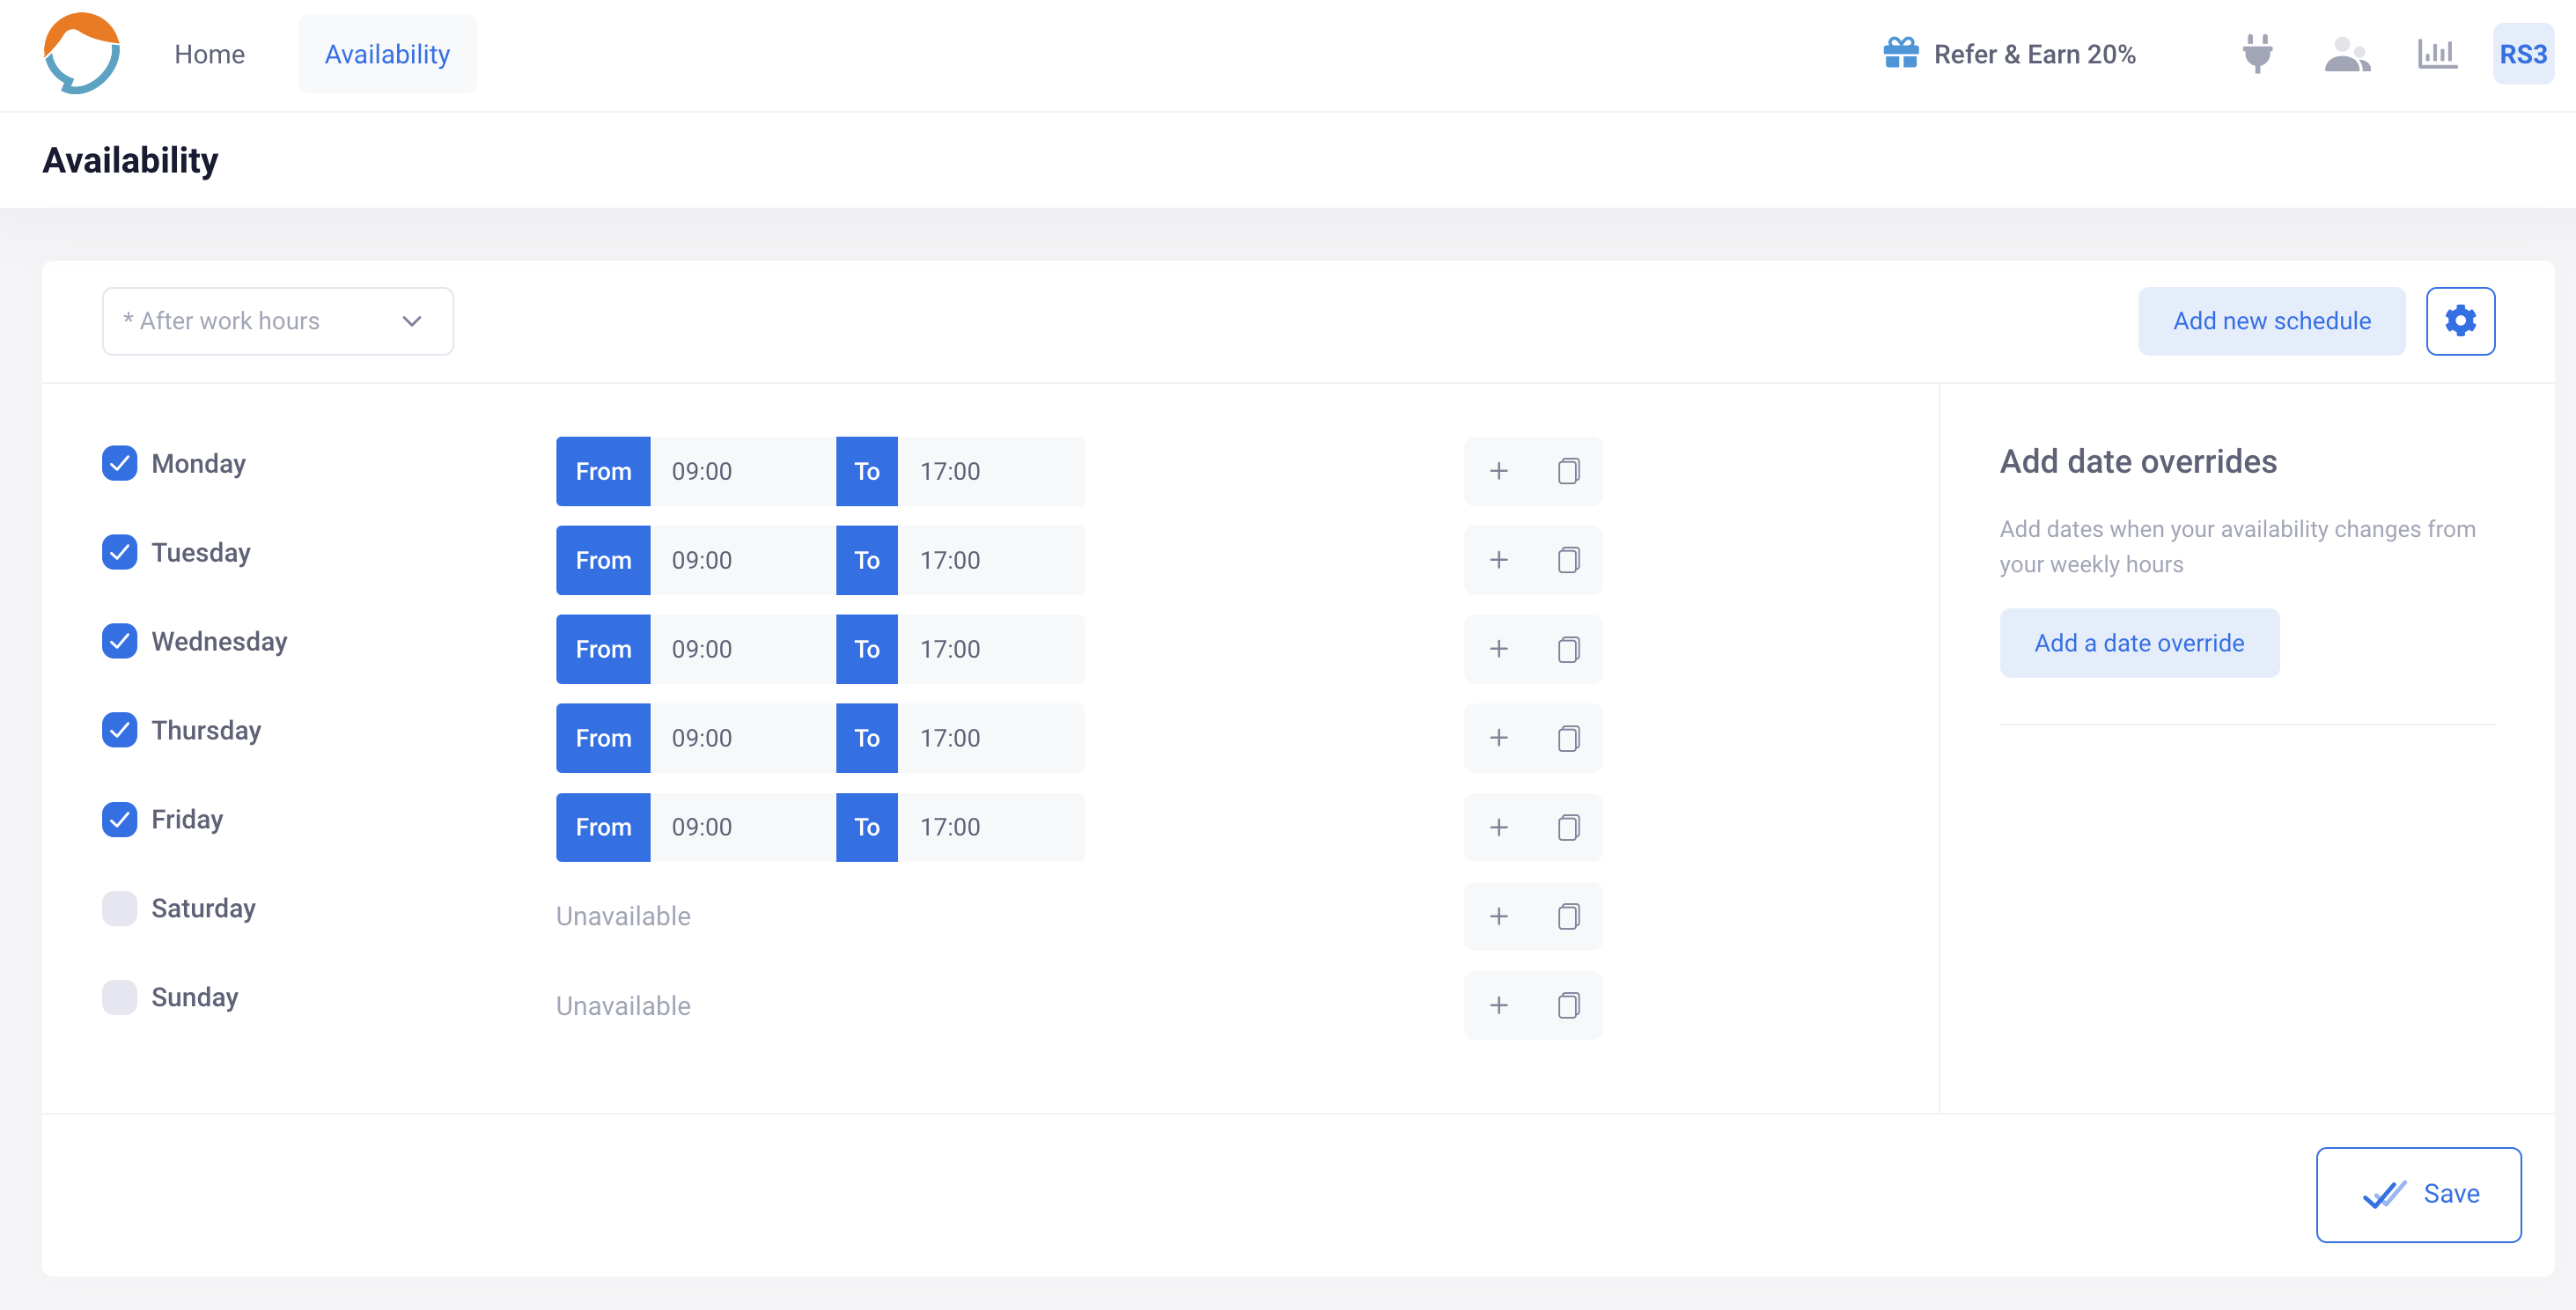
Time Slots: For each available day, you can set specific time ranges by clicking on the From and To fields. For example, you might set your availability from 09:00 to 17:00 on weekdays.
Add Multiple Time Slots
If your availability is split into multiple time periods during a single day (e.g., you have a lunch break), you can add a second time slot for any day:
- Click the + button next to the day you wish to add a new time slot for.
- Enter your second availability range by specifying the start and end times. For example, you can be available from 09:00 to 12:00 and then from 13:00 to 17:00 on Mondays.
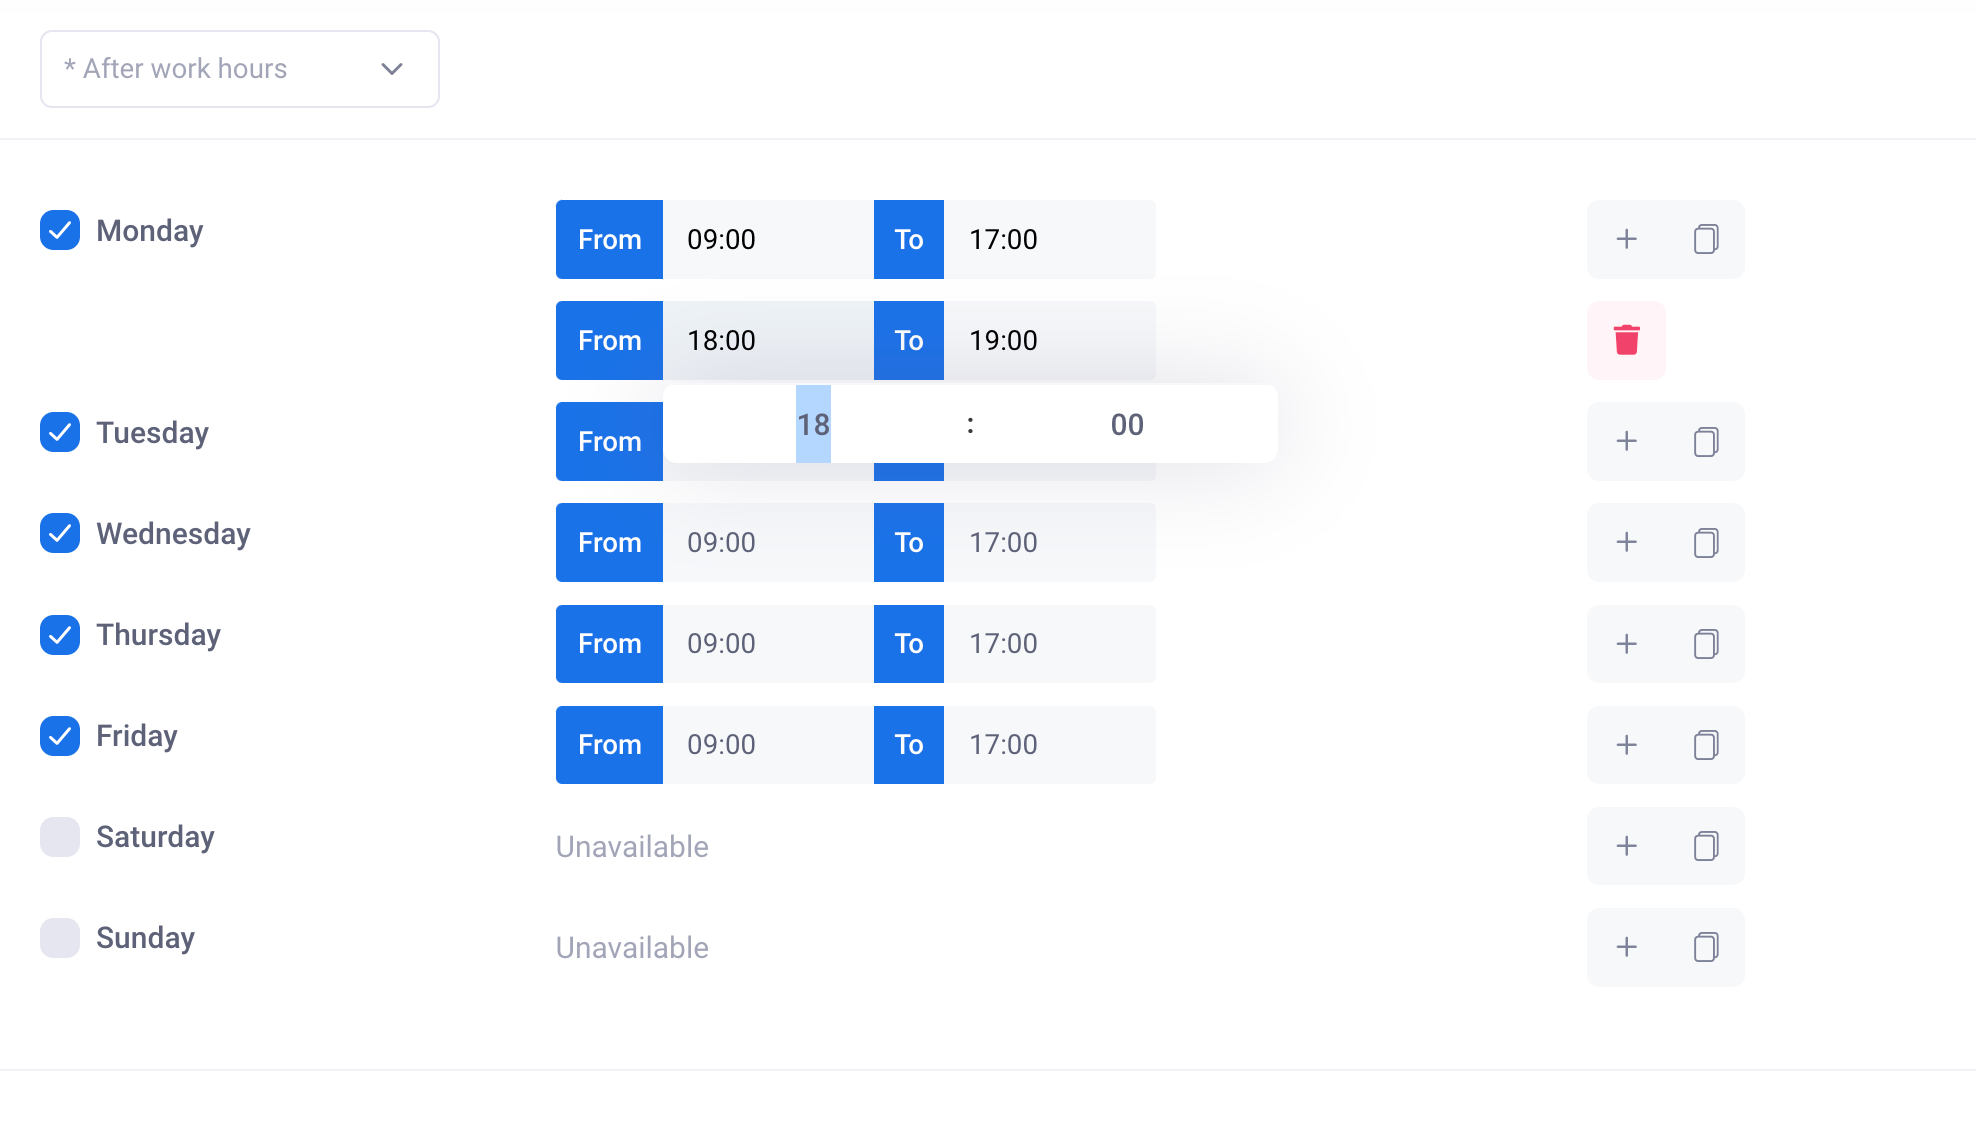
- You can delete additional time slots by clicking the trash icon next to the added time range.
3. Manage Schedules
Voxiplan allows you to create multiple schedules for different scenarios. You can manage these schedules as follows:
- Click on Add new schedule to create a new set of availability hours.
- To manage existing schedules, click on the settings gear next to the Add new schedule button. This opens options to:
- Edit Name: Rename the current schedule for easy identification.
- Clone: Duplicate an existing schedule to create a similar one with minor changes.
- Set as Default: Mark one schedule as the default for your workspace.
- Delete: Remove a schedule you no longer need.
This is particularly useful if you have different availability based on your working hours, seasonal changes, or other patterns.
4. Add Date Overrides
Date overrides allow you to modify your availability on specific dates without affecting your regular weekly schedule. Here’s how to set them up:
- Click the Add a date override button on the right side of the availability page.
- Select the date(s) for which you want to adjust your availability from the calendar view.

- Specify your availability for the selected date(s). For example, you might mark yourself as unavailable on certain holidays or set special hours for a specific day.
All overrides are listed on the right side of the screen, showing the date and specific hours or unavailable status. You can remove any override by clicking the minus icon next to it.
Date overrides apply to the specific schedule that you created them in. They will not apply to other schedules.
5. Save Your Availability Settings
Once you’ve configured your availability and date overrides, make sure to click the Save button at the bottom right of the page to apply your changes.